With digital workloads growing and families relying on multiple devices, more people are looking for reliable ways to store, protect, and share their files. A popular solution is the NAS drive, short for network attached storage. Whether you’re a home user wanting a media server or a small-business owner seeking secure file-sharing, building a NAS can transform how you manage data.
This guide explains what NAS storage is, how to build a NAS drive from scratch, and when it might be better to choose a ready-made solution like UGREEN NASync, including the highly capable UGREEN NASync DH2300.
What Is NAS Storage?
NAS storage is a dedicated device (or small server) that holds your files and makes them accessible across your network. Instead of connecting directly to one computer, a NAS connects to your router, allowing multiple devices—laptops, iPads, smart TVs, and even remote users—to access shared folders.
A NAS acts as:
- A private cloud server
- A media streaming hub
- A central file repository
- A NAS backup system for laptops, phones, and tablets
- A small business file server
Because it is always on and accessible through SMB/NFS sharing, NAS storage for home and business provides convenience and privacy without relying on third-party cloud subscriptions.
How to Build a NAS Drive: Step-by-Step Guide
Building your own NAS can be rewarding if you enjoy custom hardware, want complete control, or need a specialised solution. Below is a clear, structured path to assembling your own DIY NAS setup—from hardware to RAID configuration and app installation.
1. Choose Your NAS Hardware
Before assembling your NAS, select the right components. The foundation of any good NAS system is stable, efficient hardware.
a. NAS Enclosure or Custom Case
You can start with either:
- A dedicated NAS enclosure,
- A small form-factor PC case, or
- A repurposed mini-PC.
Purpose-built enclosures offer better airflow and quieter operation, but a small PC gives more flexibility.
b. Processor (CPU)
A NAS does not require extreme power, but the CPU must handle:
- File transfers
- RAID calculations
- Media streaming (especially transcoding)
- Background services
Low-power Intel or AMD processors, or ARM-based chips, work well for simple setups. For 4K transcoding or heavier loads, consider modern multi-core CPUs.
c. Memory (RAM)
For smooth multitasking:
- 4–8GB RAM suits basic home use
- 16GB+ for virtual machines, containers, or heavy server tasks
d. Reliable Storage Drives
Select NAS-grade HDDs or SSDs built for 24/7 operation. Good NAS drives include:
- Seagate IronWolf
- WD Red
- Toshiba N300
SSDs can be used for caching or high-speed performance.
e. Network Interface
A minimum of 1GbE is required, but 2.5GbE or 10GbE dramatically improves NAS for media streaming and multi-user situations.
2. Install the NAS Operating System
Once your hardware is assembled, install a suitable NAS operating system.
Popular choices include:
● TrueNAS CORE / SCALE
A powerful open-source OS with ZFS support, excellent for users wanting enterprise-grade features.
● OpenMediaVault
Lightweight, simple to configure, ideal for beginners building a home NAS.
● UnRAID
Great for mixed workloads, Docker apps, and flexible RAID-style storage.
● Linux Distributions (Ubuntu, Debian)
Ideal for advanced custom server builds.
After choosing your OS:
- Flash the OS image onto a USB drive.
- Boot your new NAS from the USB.
- Follow on-screen instructions to configure basic settings.
3. Configure Your Network
A NAS is only as effective as its network setup. Proper configuration ensures stable connections and fast transfer speeds.
a. Assign a Static IP Address
This ensures your laptops and mobile devices always detect the NAS at the same address.
b. Enable SMB/NFS Sharing
Most home users rely on SMB for Windows and macOS access.
Linux users may prefer NFS.
c. Create User Accounts and Permissions
Set separate logins for each family member or employee to maintain file security.
d. Enable Remote Access (Optional)
For accessing files while travelling:
- Use VPN
- Enable secure cloud portals (depending on the OS)
4. Set Up Your RAID System
RAID protects your data from drive failure. Each option balances performance, redundancy, and capacity.
Common RAID Levels
- RAID 0 – Fast, no redundancy
- RAID 1 – Mirrored drives, strong protection
- RAID 5 – Balanced performance + capacity + redundancy
- RAID 6 – Survives 2 drive failures
- RAID 10 – High speed + strong protection
Choose RAID based on your usage:
- Large media libraries → RAID 5 or 6
- Critical business documents → RAID 1 or 10
- High-speed workloads → RAID 10
Always remember: RAID is not a backup. Still maintain external backups or cloud mirroring.
5. Install NAS Applications
Modern NAS systems can run various apps and services, turning your DIY project into a full server.
Popular App Categories
- Media Servers: Plex, Jellyfin, Emby
- Backup Tools: Time Machine support, rsync, Duplicati
- Productivity: Nextcloud, Syncthing
- Virtualisation: Docker, VMs
- Security: Snapshotting, firewall rules
Apps transform your NAS storage into a multifunction server suitable for home offices, creatives, or businesses.
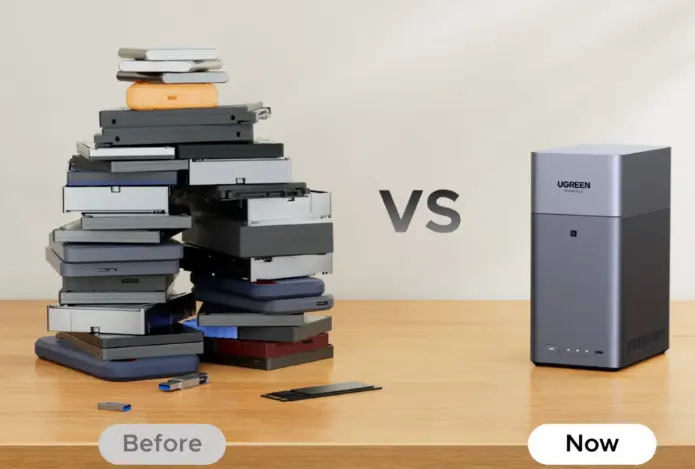
DIY NAS vs UGREEN NASync: Which Should You Choose?
While building a NAS is a rewarding project, not everyone wants to deal with hardware assembly, OS configuration, RAID tuning, or troubleshooting. This is where ready-made devices like UGREEN NASync simplify everything.
DIY NAS Setup: Pros and Cons
Pros
- Maximum customisation
- Ability to upgrade any hardware component
- Ideal for enthusiasts or special server applications
Cons
- Requires technical knowledge
- More time-consuming to set up and maintain
- Can be more expensive after adding components
- Higher energy consumption
- No single-vendor support
UGREEN NASync Pros and Cons
UGREEN NASync delivers a polished, user-friendly alternative to DIY systems.
Pros
- Ready to use out of the box
- Highly efficient hardware with low power usage
- Integrated app ecosystem for file sharing, streaming, and backup
- Automatic RAID configuration
- Excellent performance for NAS for home office, media streaming, and multi-user access
- Fast setup through mobile app
- Silent, compact design
Cons
- Less customisable than a DIY build
- Limited to supported apps and configurations
Why Many Users Prefer UGREEN NASync
For most home users, creators, and small businesses, the simplicity of UGREEN NASync—especially the UGREEN NASync DH2300—often outweighs the complexity of building a NAS manually. It delivers:
- Reliable performance
- Hassle-free software
- Automated updates
- A smooth experience for NAS beginners
Use Cases for Home and Small Business
Both DIY NAS and UGREEN NASync systems are versatile tools. Here are common scenarios.
For Home Users
1. Media Streaming Centre
Use your NAS as a home media server for films, photos, and music.
2. Family Backup Hub
Automatically back up laptops, phones, and tablets to a central location.
3. Private Cloud Storage
Avoid subscription fees and enjoy local control over your files.
4. Smart Home Integration
Store surveillance camera footage or home automation data securely.
For Small Businesses
1. Centralised File Server
Enable easy, controlled access to documents for staff.
2. NAS Backup System
Protect business-critical data with versioning and RAID redundancy.
3. Remote Collaboration
Grant clients or partners secure remote access to project files.
4. Cost-Effective Storage Expansion
Avoid expensive enterprise servers by using efficient server NAS storage solutions.
NAS Hardware Optimisation Tips
To get the most out of your NAS—DIY or UGREEN—follow these optimisation strategies.
Use High-Quality, NAS-Specific Drives
Always choose reliable storage drives designed for continuous operation.
Enable Caching
SSD caching accelerates file indexing, searches, and metadata access.
Maintain Good Cooling
Proper airflow prevents drive wear and extends hardware lifespan.
Schedule Backups
Use automated backup routines for peace of mind.
Stay Updated
Keep firmware and apps current, especially if remote access is enabled.
Conclusion
Building your own NAS drive gives you full control over your hardware and software environment. From selecting components to configuring RAID and installing apps, a DIY NAS setup can be powerful and rewarding for technical users.
However, if you want a streamlined, energy-efficient, and reliable solution without the complexity, the UGREEN NASync series—particularly the UGREEN NASync DH2300—offers exceptional performance for both home and small business environments.
Whether you choose DIY or a ready-made system, a NAS provides a secure, flexible, and centralised way to manage your digital world.
Also Read-Online Lead Generation Techniques for Professional Services